9 tips to build a better Confluence intranet with Refined on data center
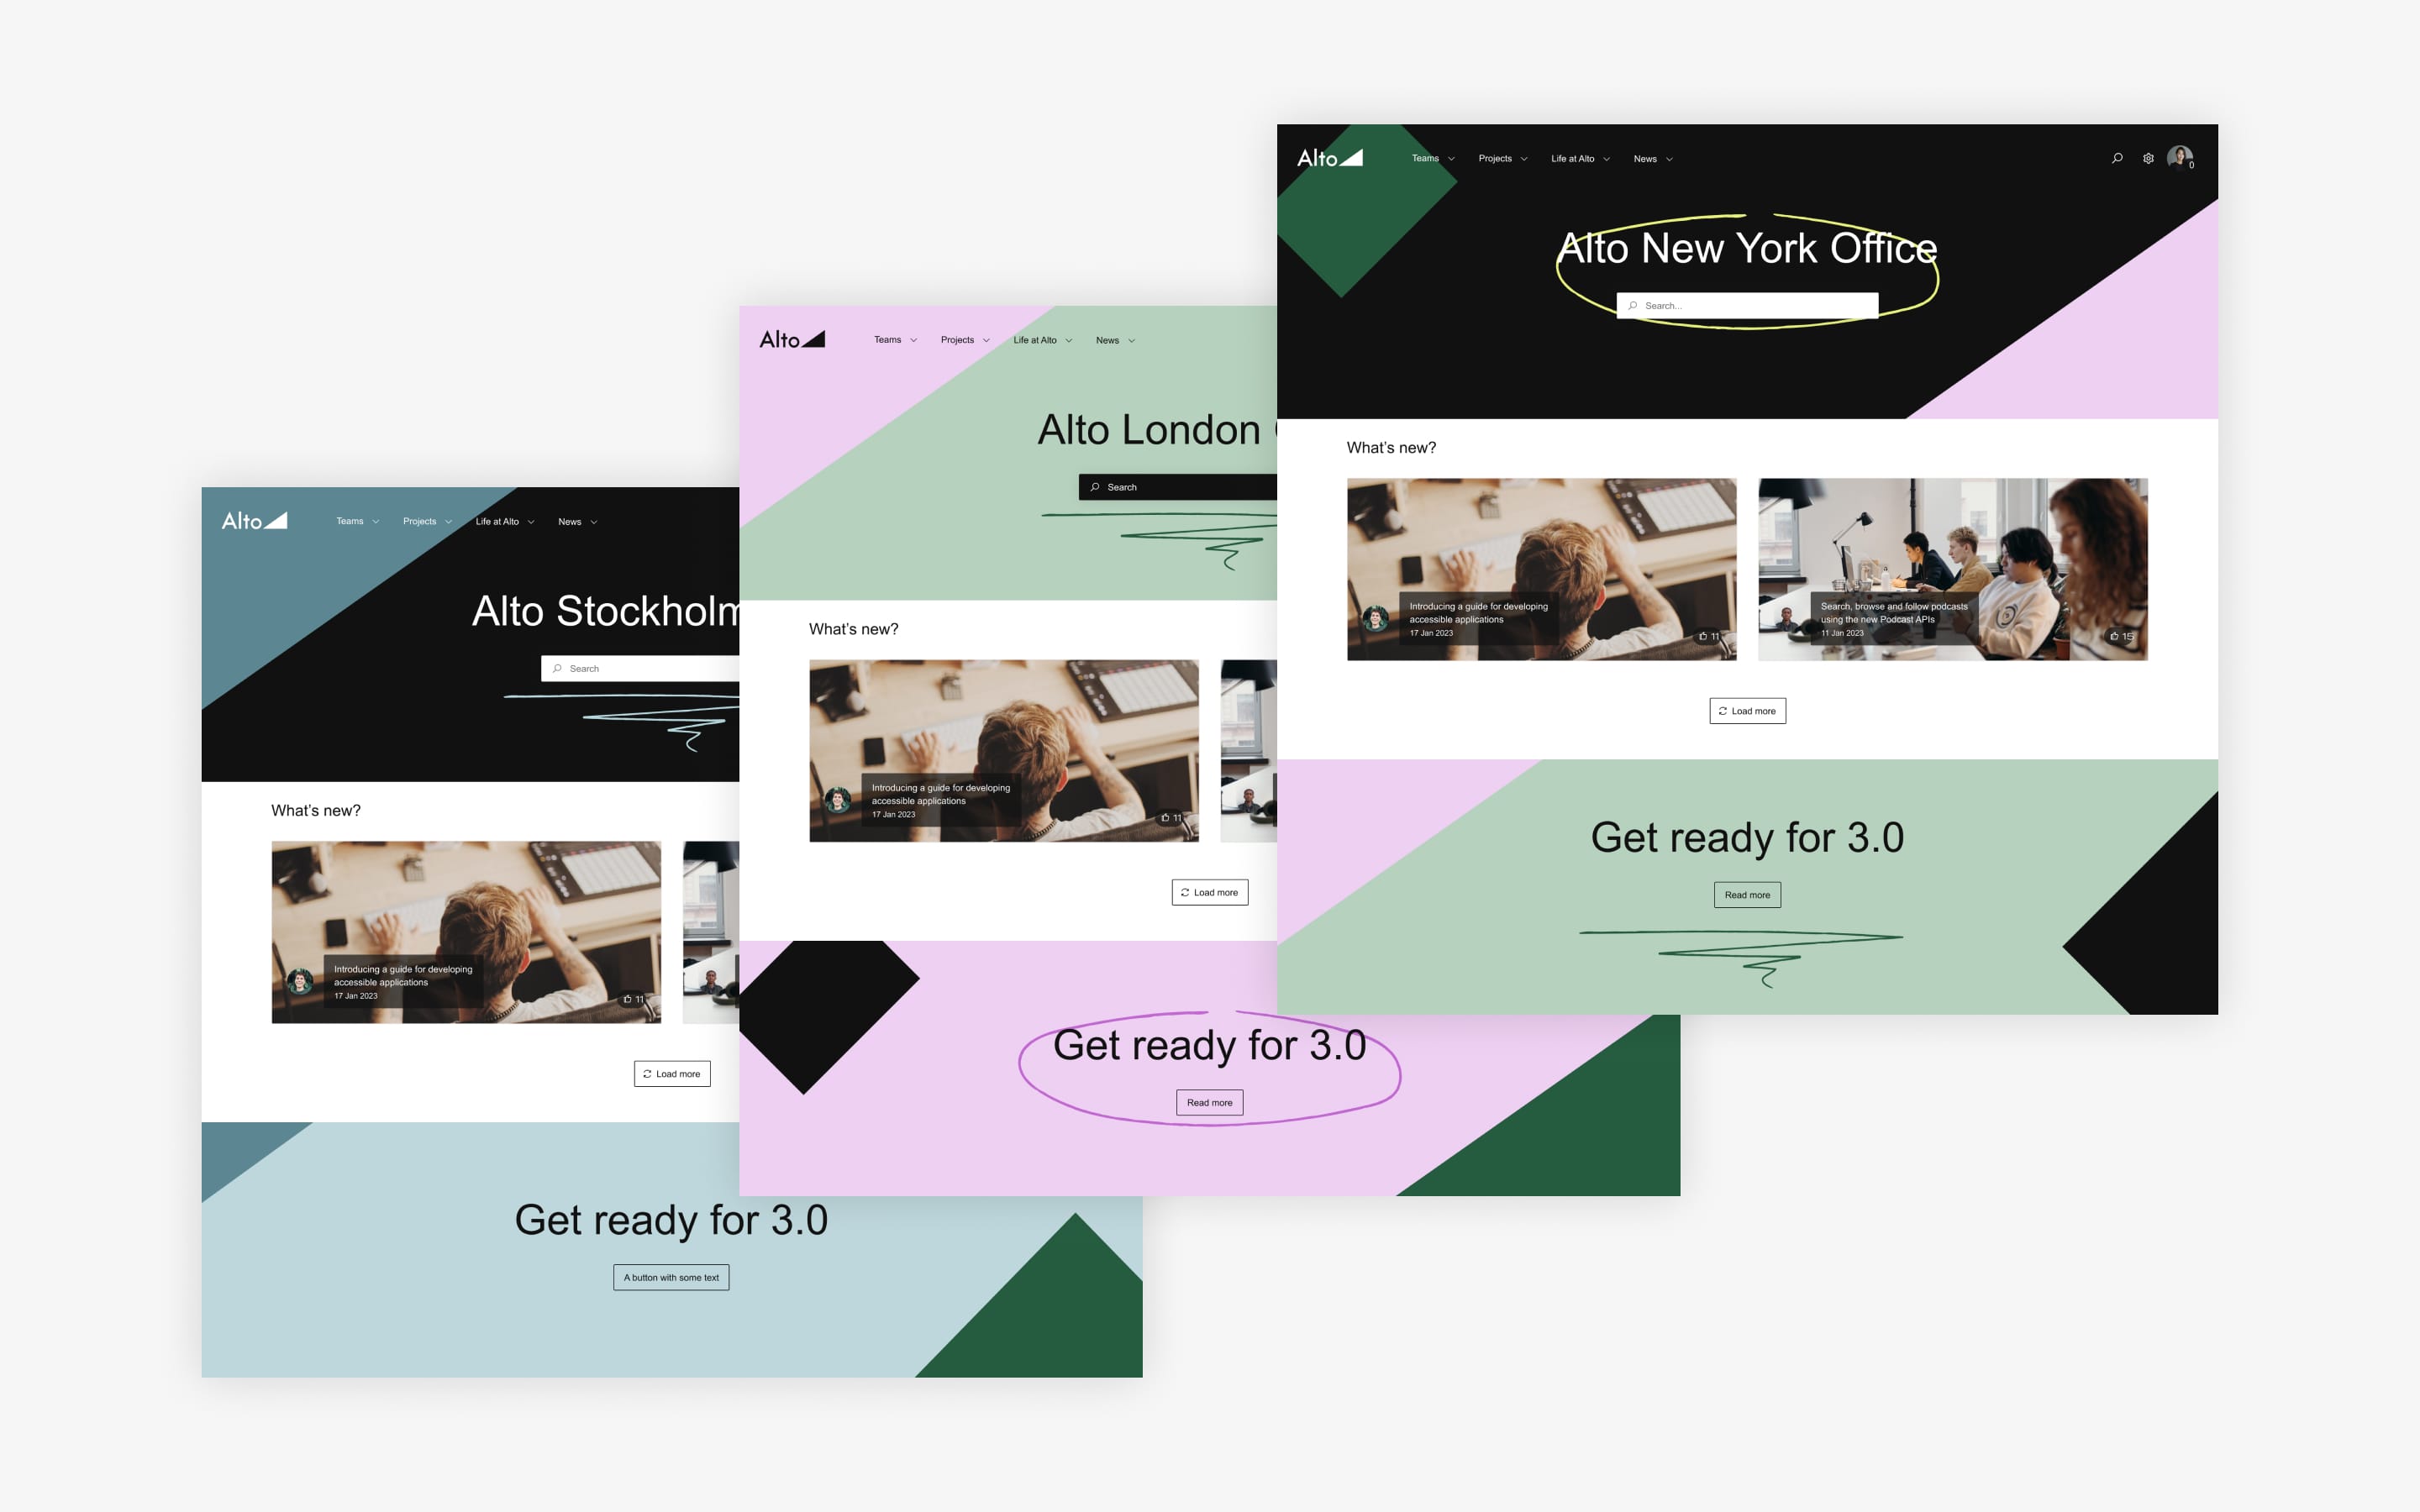
Even massive enterprise intranets can feel small and welcoming with these strategies to improve the user experience.
Large companies typically have large intranets. For those using Confluence Data Center, that could mean a massive volume of pages, spaces and users.
If you want your Confluence instance to function like an intranet—an easy-to-use, one-stop-shop for company news, collaboration tools, critical info, and team hubs—you’ll get best results if it’s tailored to your user base for those purposes.
By organizing and grouping pages and spaces, adding a navigation menu, and applying themes, among other customizations, Refined turns Confluence into something else entirely: a custom, website-like intranet that’s easy to navigate—and a site that employees actually want to visit and value.
But with so much content and so many users, how do you pull it all together? We'll share everything you need to consider as you build.
Tip 1: Divide and conquer with multiple sites
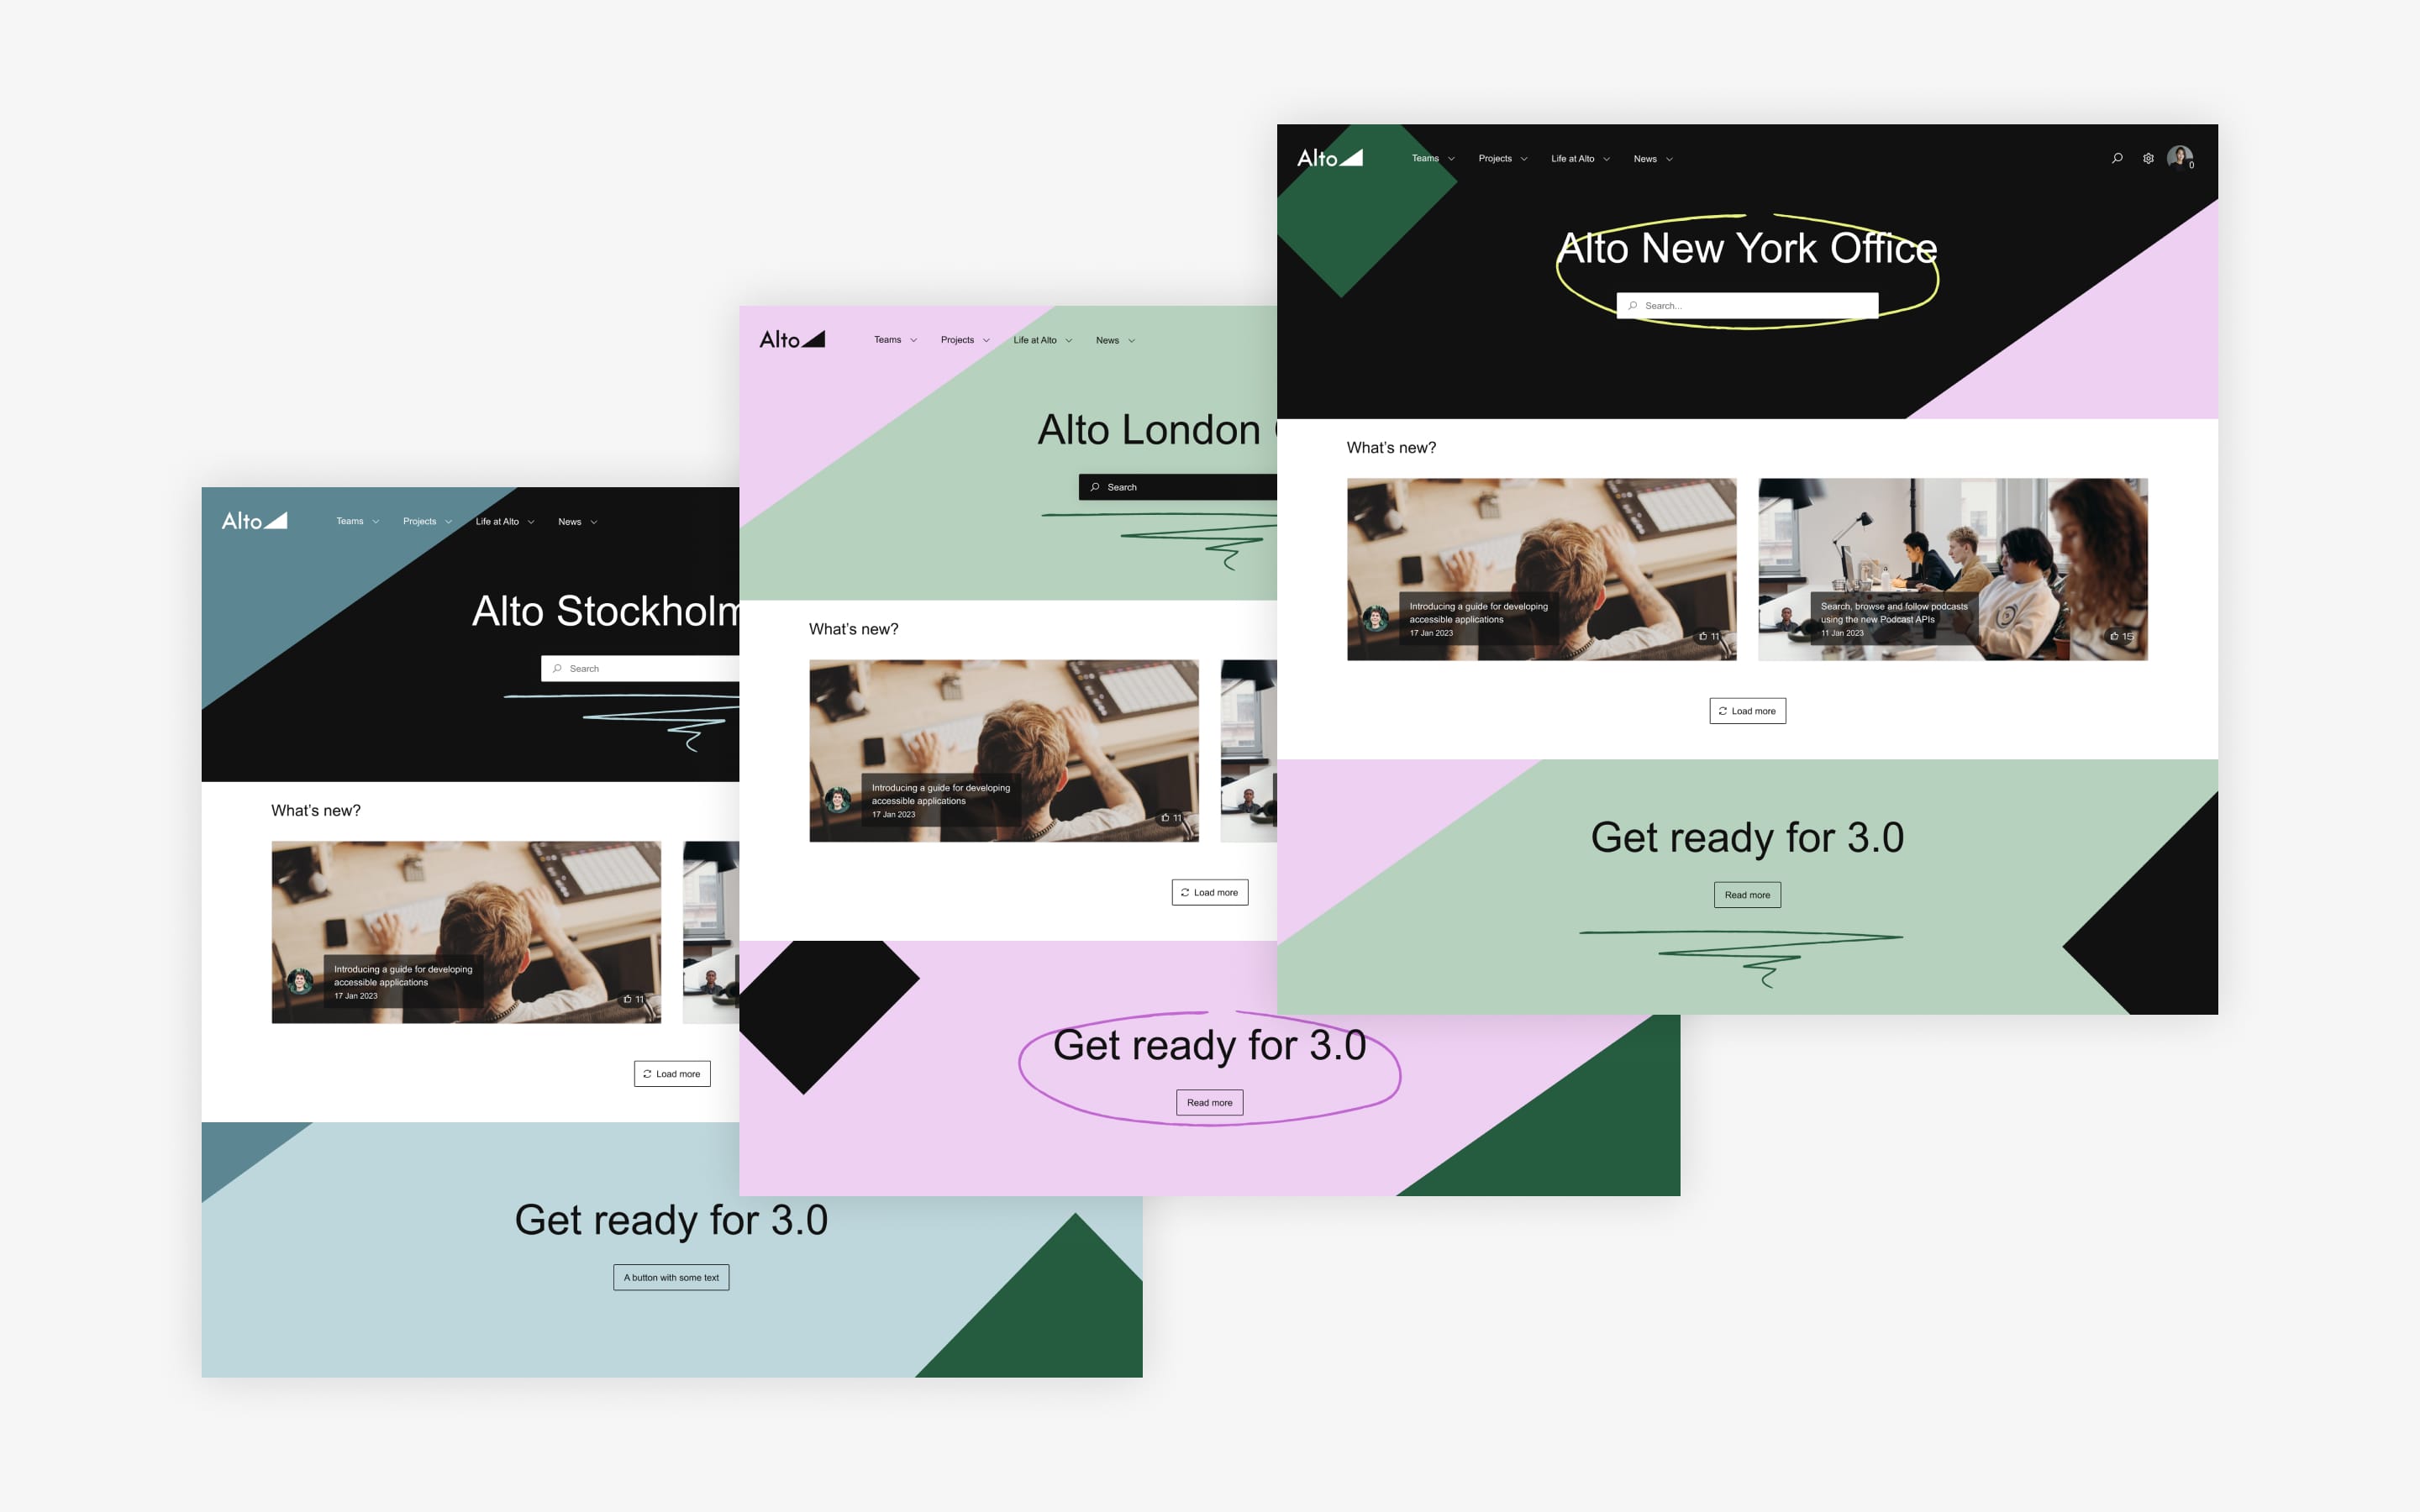
If you have a large volume of Confluence content but you want to create a targeted intranet experience—one where users can quickly find what they're looking for without having to sift through lots of irrelevant content—consider breaking your Confluence content out into separate sites.
Sites can function as homes for specific types of content, or for content that’s useful for a particular audience.
With Refined, you can build as many sites as you want, public or private, from a single confluence instance.
To start, ask yourself if there is any content you can remove from what you now call your intranet to de-clutter. If so, spin that content off into a separate site.
To create multiple Confluence sites with Refined:
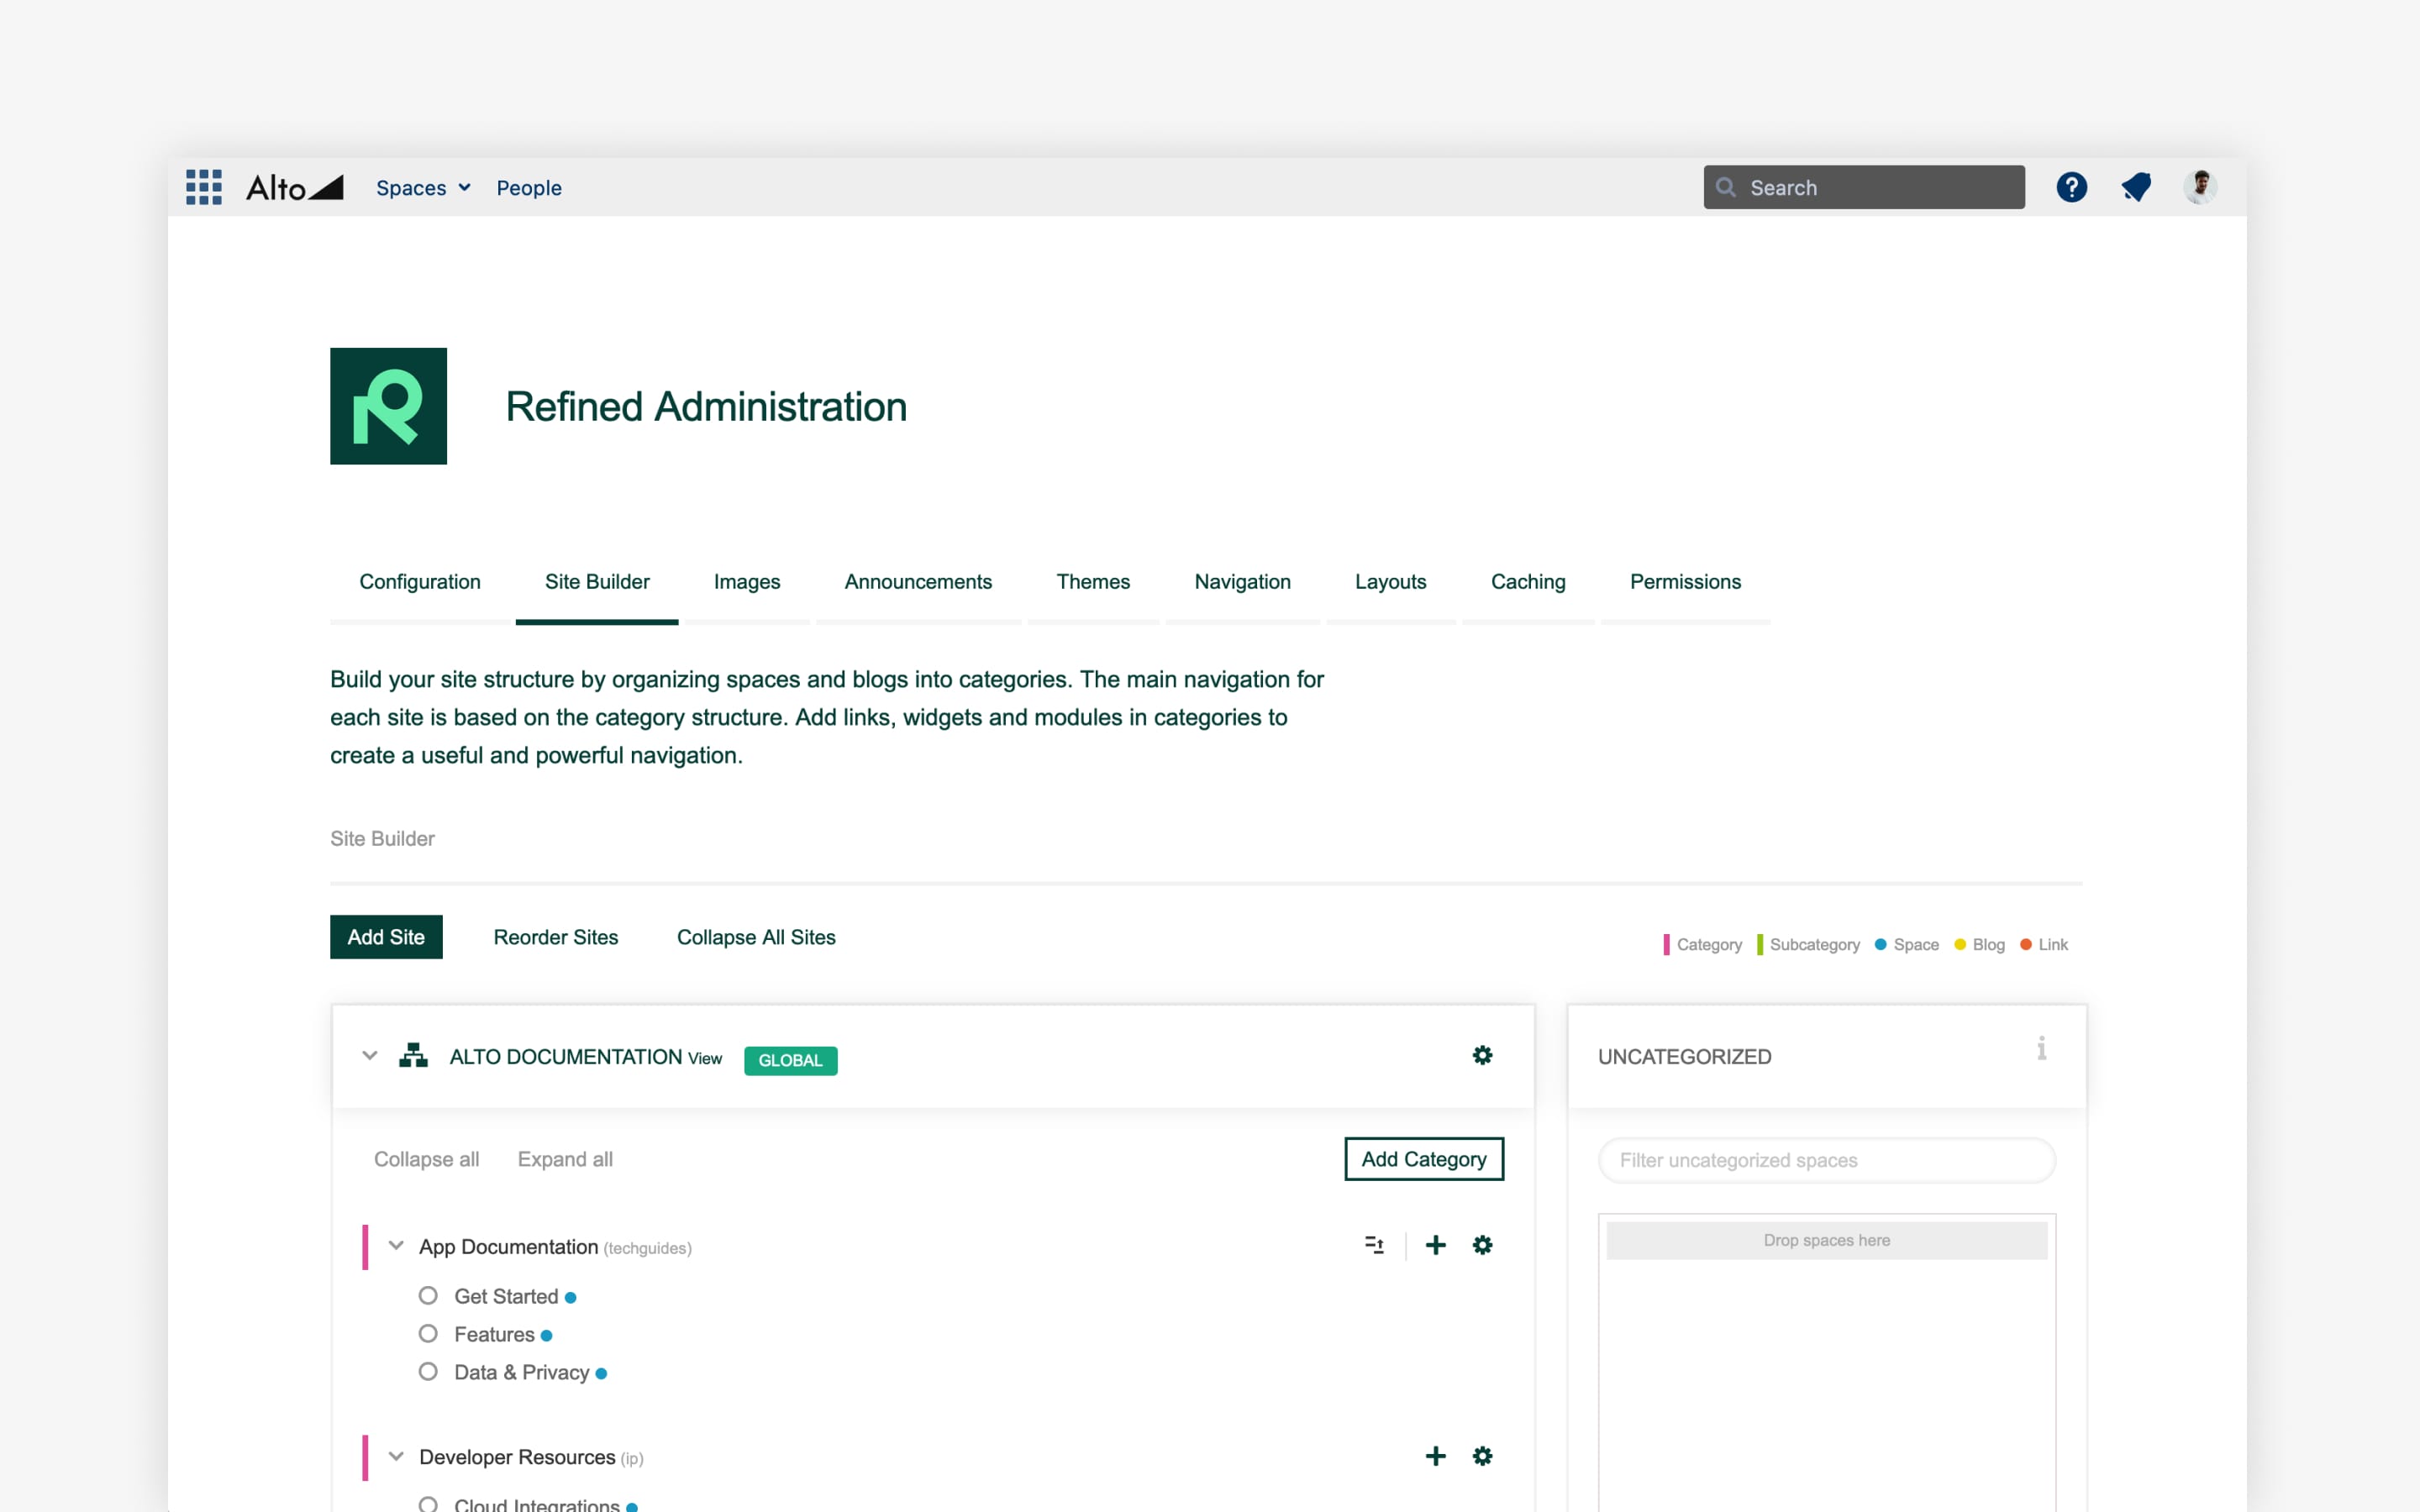
- Go to the Refined Administration, then to the Site Builder.
- Click Add Site
- Choose Full Site or Single-Space Site (Full Site is most common)
- Arrange your sites, Categories and spaces according to your desired hierarchy in the Site Builder
Learn more about working with multiple sites on Refined for Confluence Data Center.
Tip 2: Use Categories to create a navigation menu
Once you’re clear on which content will comprise your intranet site, you can use Categories in Refined to create groups of spaces. Common Categories include teams, projects, departments, sets of instructions, and stages of production. Spaces inside a teams Category, for example, might be marketing, sales, product, finance, design, and IT.
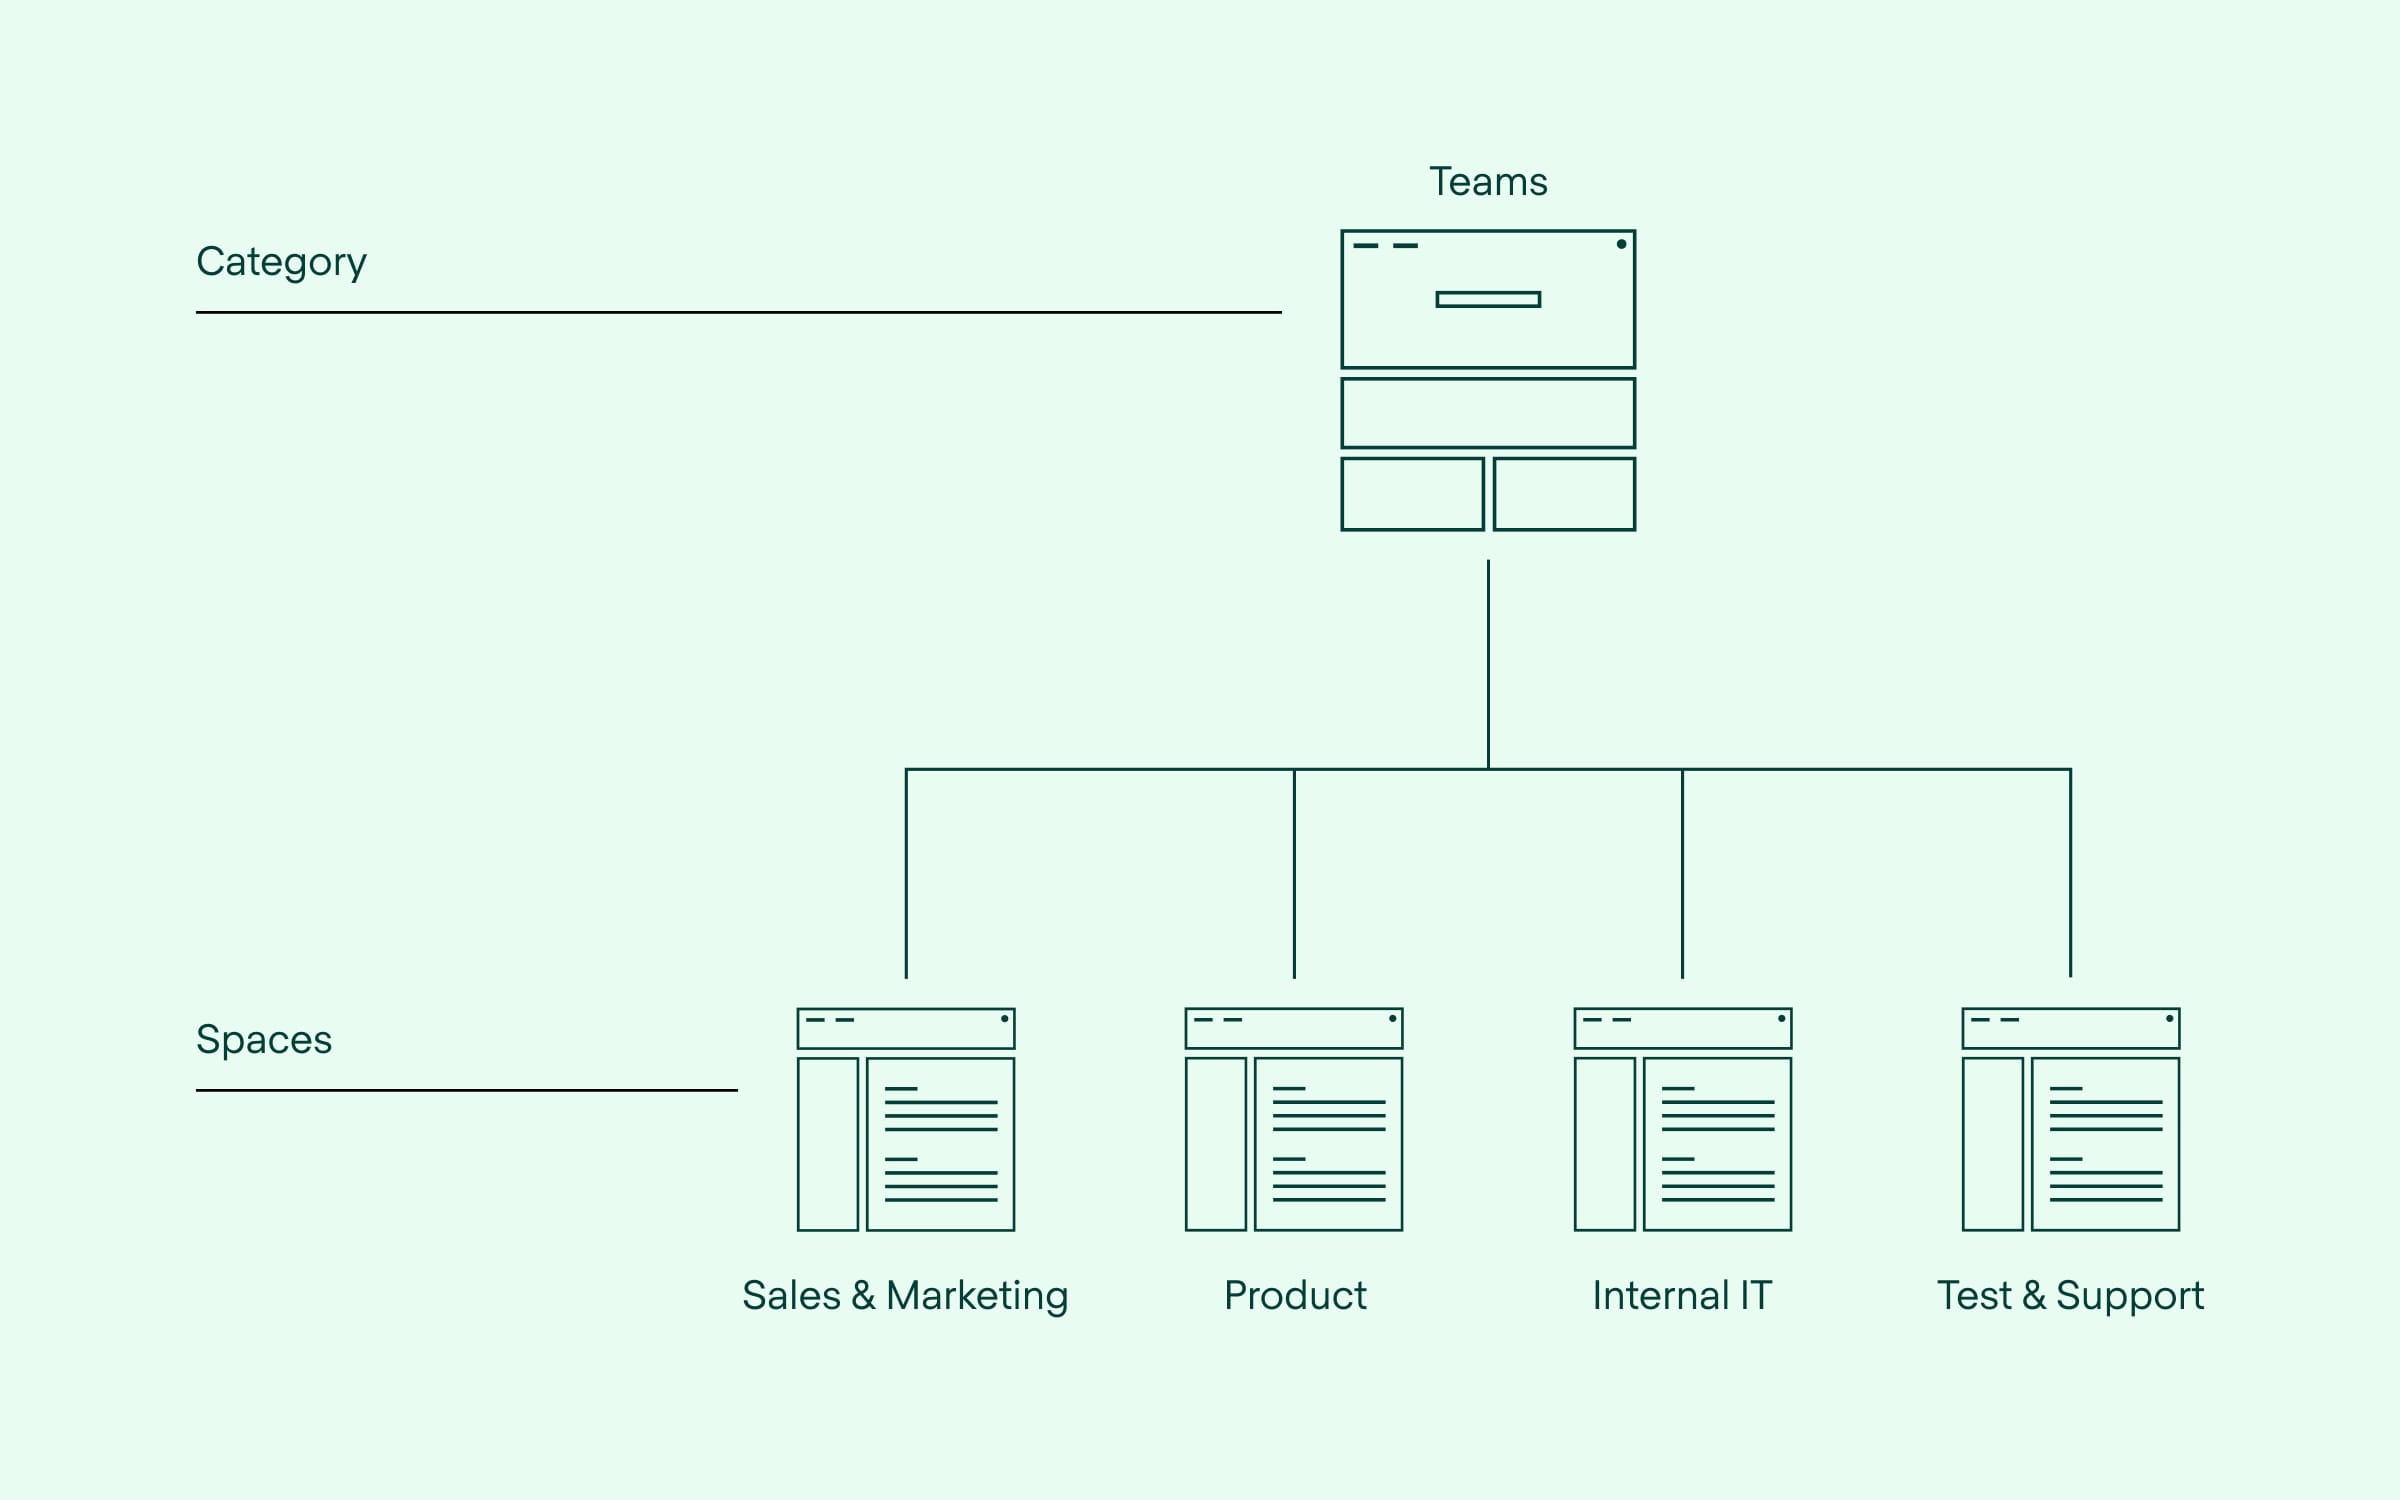
You can design a Category for anything you'd like and fill it with whatever spaces make sense for your purposes.
Categories appear in the global navigation bar on your Refined site as drop-down items containing links to the spaces grouped under them.
Here's how to add Categories to your site structure with Refined:
- Go to the Refined Administration, then to the Site Builder.
- Click Add a Category.
- Give your Category a name and a unique Category key.
- Proceed with grouping spaces under the Category with simple drag and drop—or add sub-Categories to create additional layers of hierarchy.
Tip 3: Optimize your site's performance
A huge perk of structuring your content with sites and Categories: your intranet will run faster. Instead of loading, say, 100 spaces onto a single site, you can load 30-ish on three sites. Parceling out the content this way makes it quicker to fetch and render.
Manually assign Category and space permissions
For exceptionally large instances with a very high volume of spaces, you can also speed up your site by assigning permissions to user groups at the Category and site level.
Why? When a user logs on, Refined automatically calculates which Categories should be visible to them. The more Categories and spaces there are, the more burdensome those calculations become, which slows down performance.
Manually assigning permissions with Refined eliminates the need to constantly check and verify permissions.
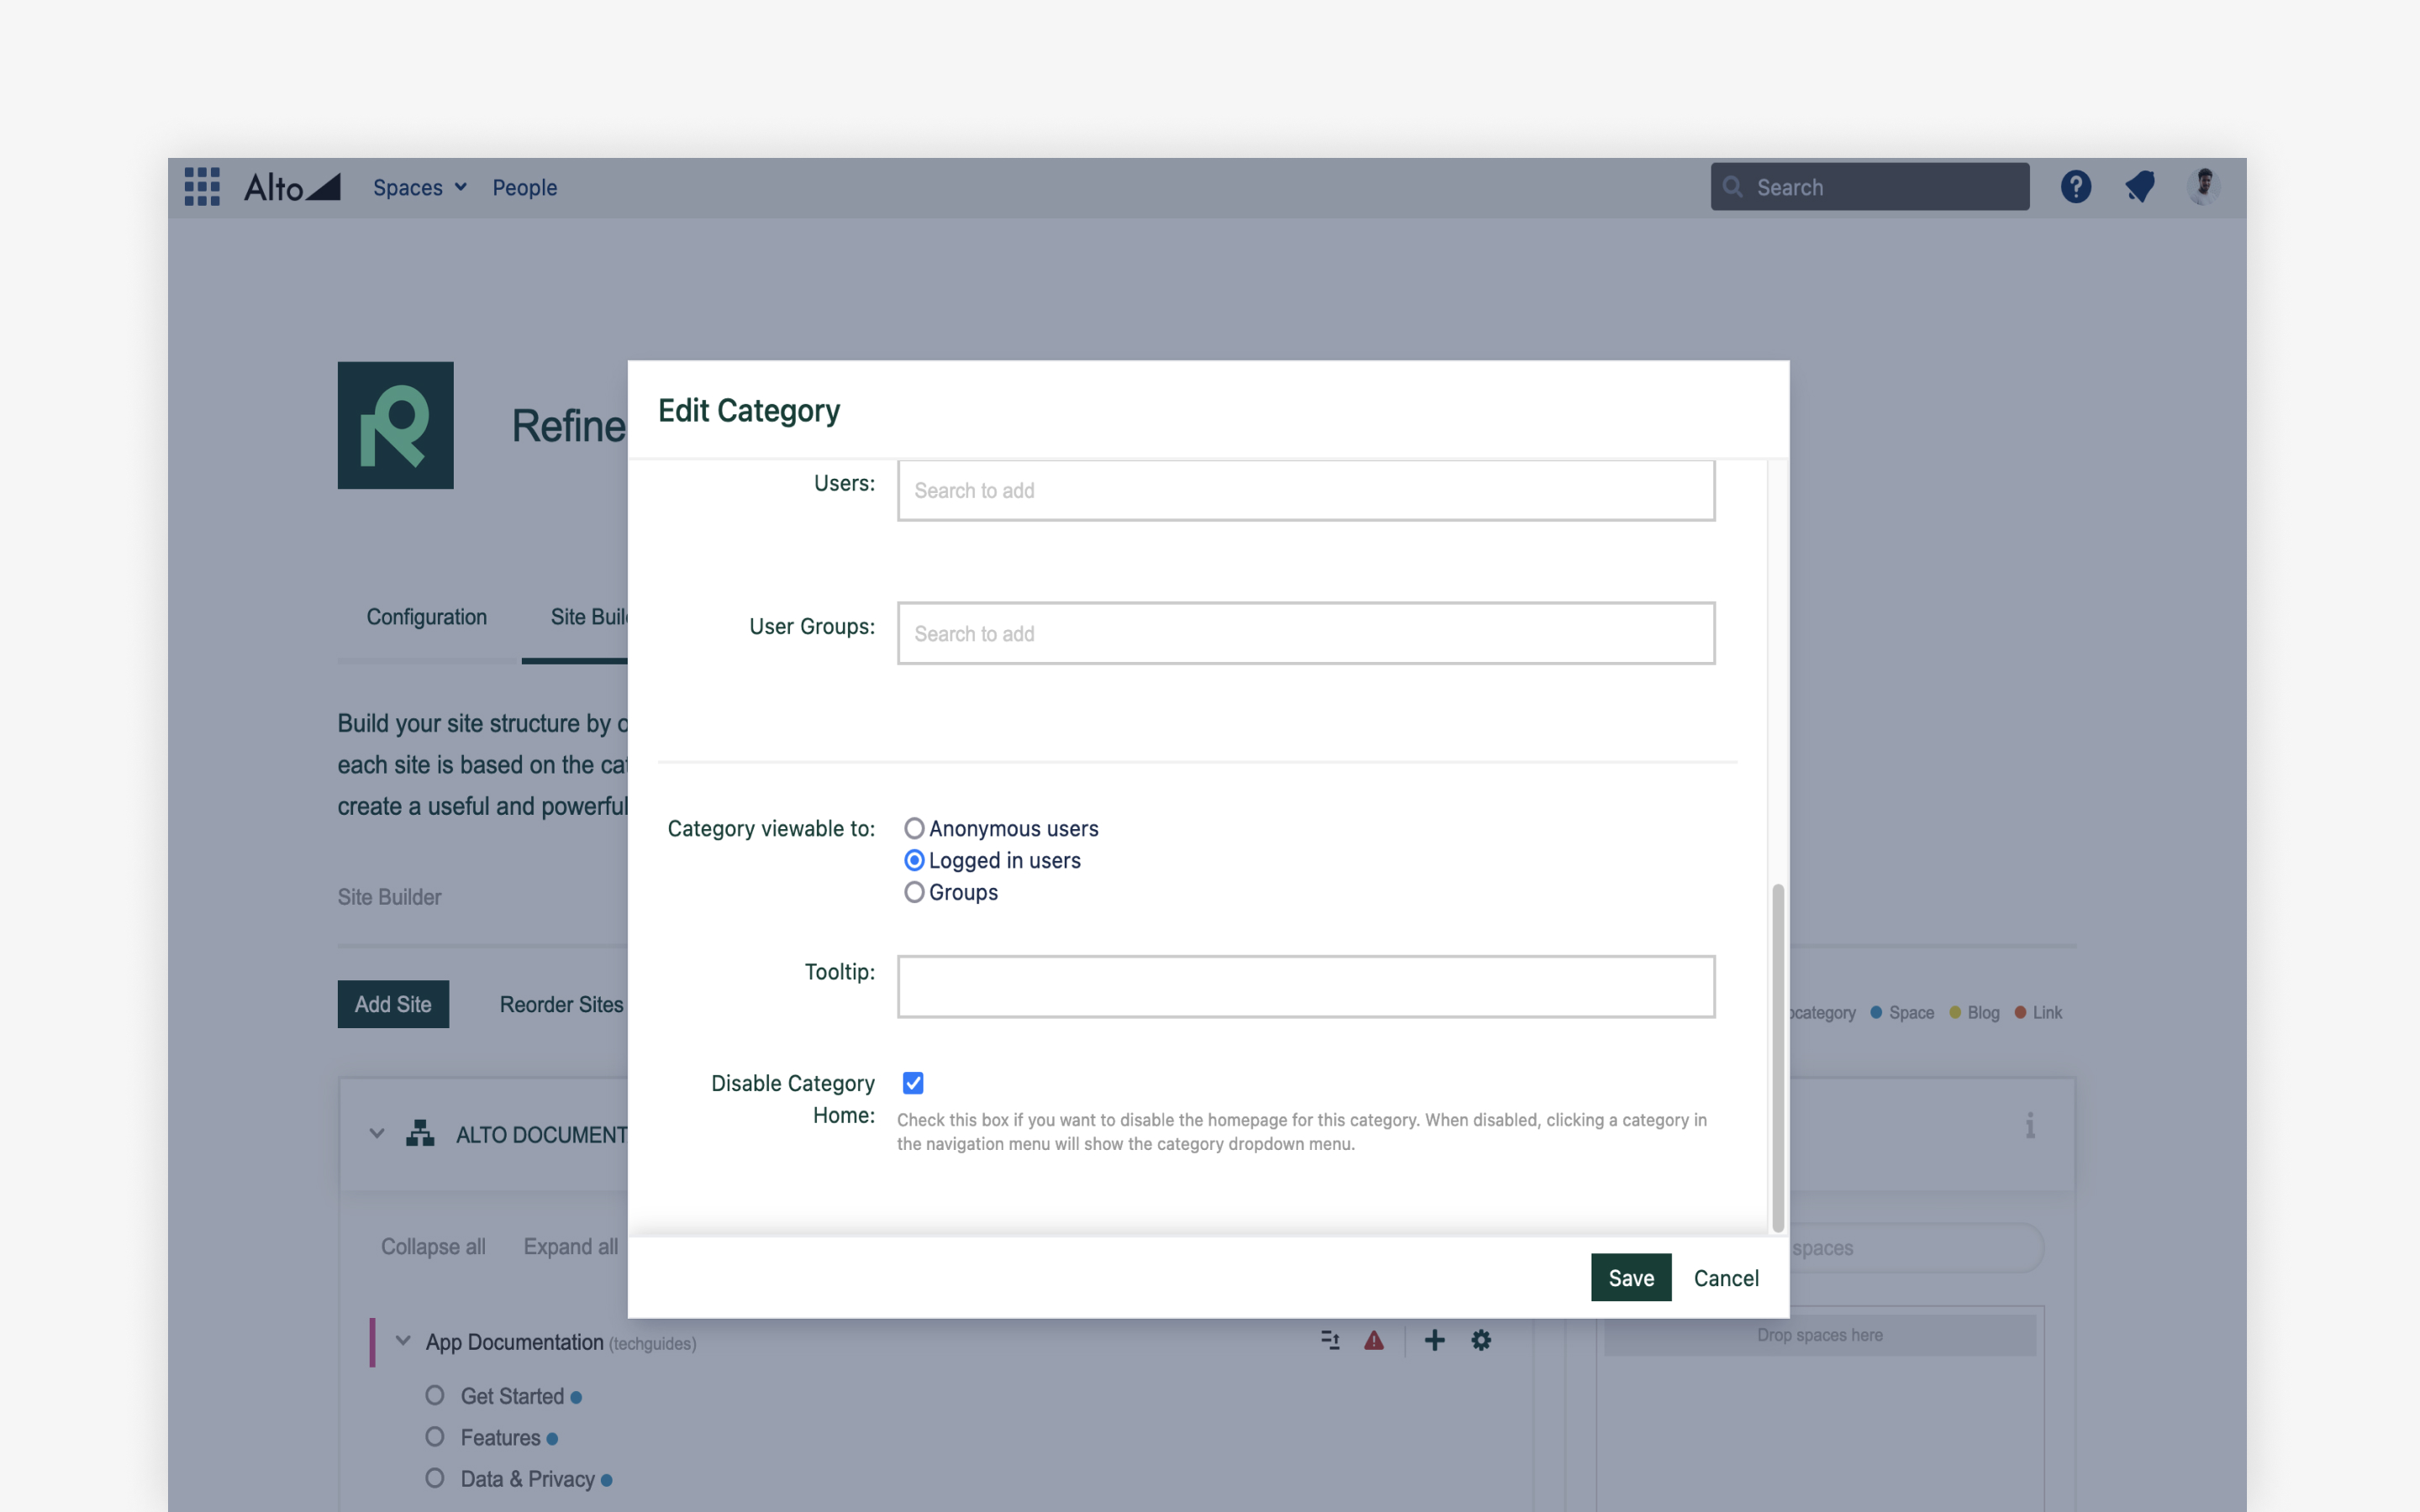
You can set up these Category permissions in Refined. Check "use manual Category permission settings" under the Configuration tab to enable this mode.
Default to collapsed subcategories
If you have multiple Categories and subcategories, you have the option to collapse subcategories by default in the menu. This gets the site to only load the parent Category, which saves time for instances with a high volume of subcategories.
Turn on the cache
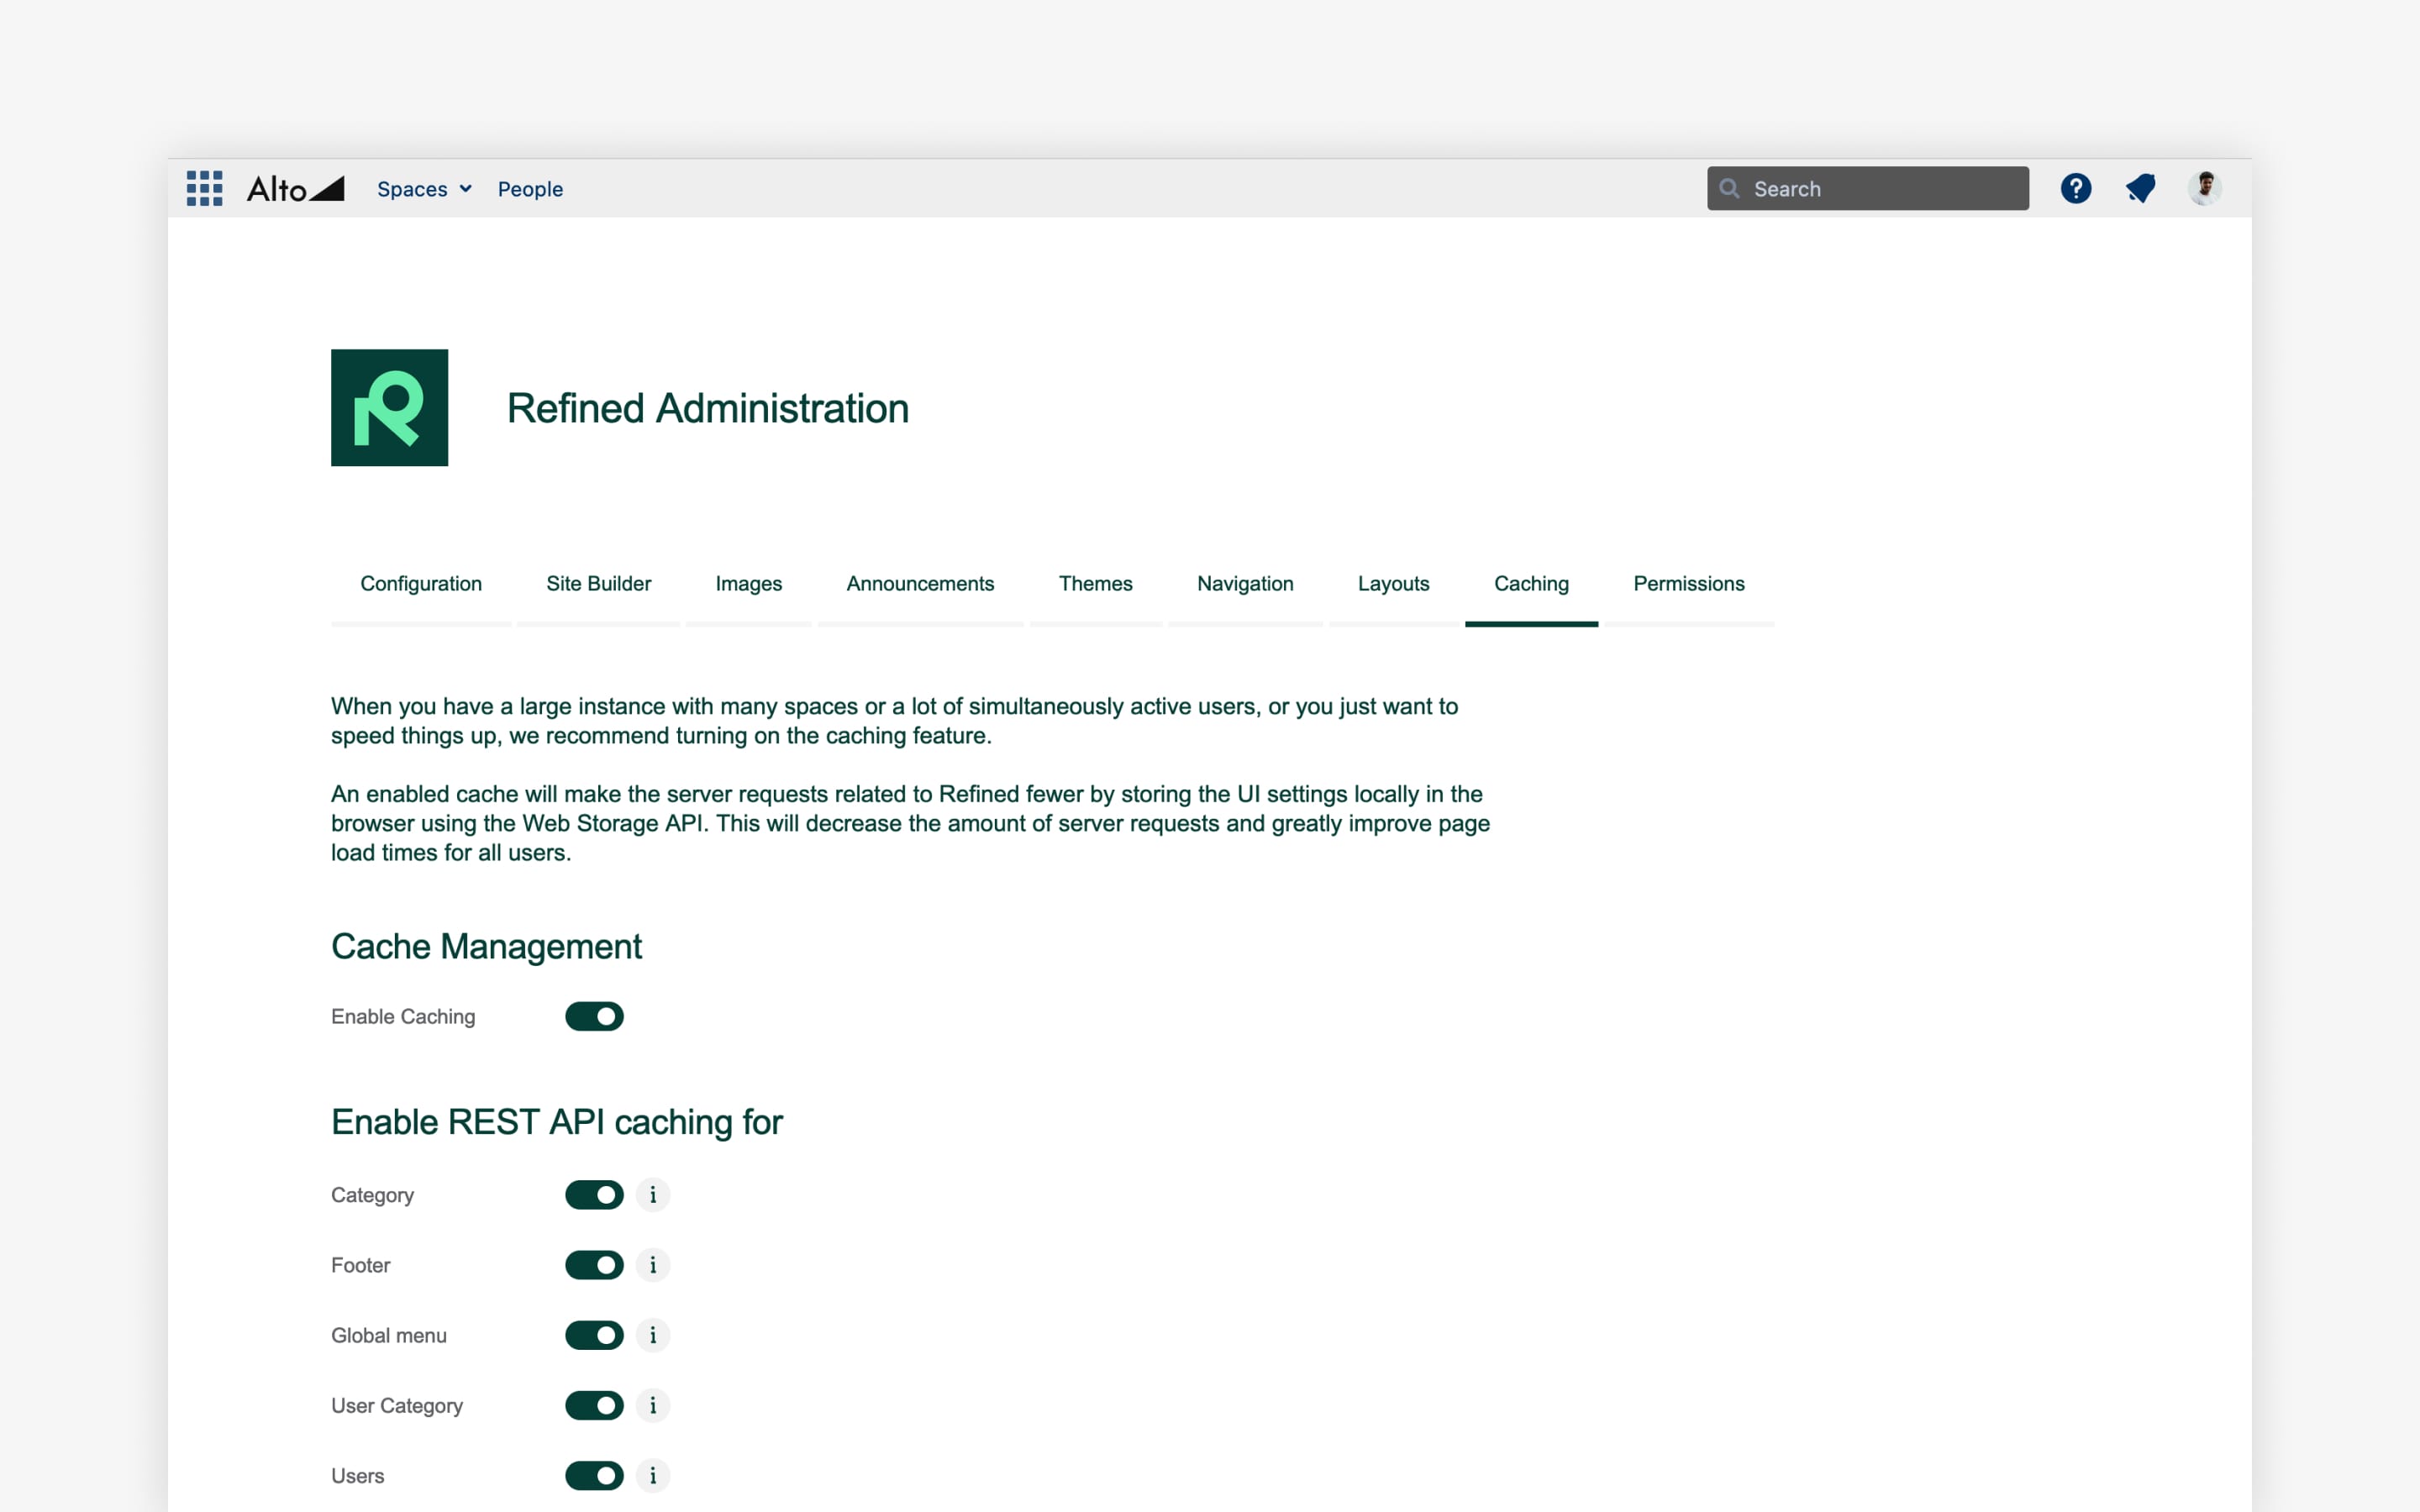
Enabling the caching feature speeds up loading by storing relevant content for each user on their local machine. It's especially recommended for large instances with lots of simultaneously active users.
To turn on the cache:
- Navigate to Theme Configuration
- Under Caching, check the Enable Caching box, along with every other box underneath it.
While this step takes a moment to load the first time around, it's much quicker for subsequent loads.
Tip 4: Hash a plan for your global site home
The global site home functions as the "parent" site of your entire Confluence. If you don't account for it in your intranet design, you may not know what to do with it once all the content is active.
You're better off planning ahead.
One idea is to treat it like a homepage for everyone. The global site is just that—global. All “universal” content relevant to all users across all sites, categories and spaces, can live here.
Alternatively, you can set start sites for certain user groups to bypass the global site home altogether.
Confluence admins can edit the site home from the page by clicking "edit" in the top right corner.
Tip 5: Choose the best configurations for every site and user group
While your global site’s settings will serve as the default settings for all the sites beneath it in the hierarchy, every site can divert from the default with its own configuration. If you set them up right, a big intranet can feel small:
- Configure group start sites — Refined lets you set up different start sites for different users, so that they're immediately landing on sites that are most relevant.
- Configure view permissions to personalize the experience, defining which users see what content.
- Add site administrators to delegate to those who manages the content. This allows people who know the user base well to curate those sites and keep them updated.
- Customize menu and footer settings for each site, so that you're giving the right audience the right links and ensuring each user can find relevant information easily.
Tip 6: Create space layout templates
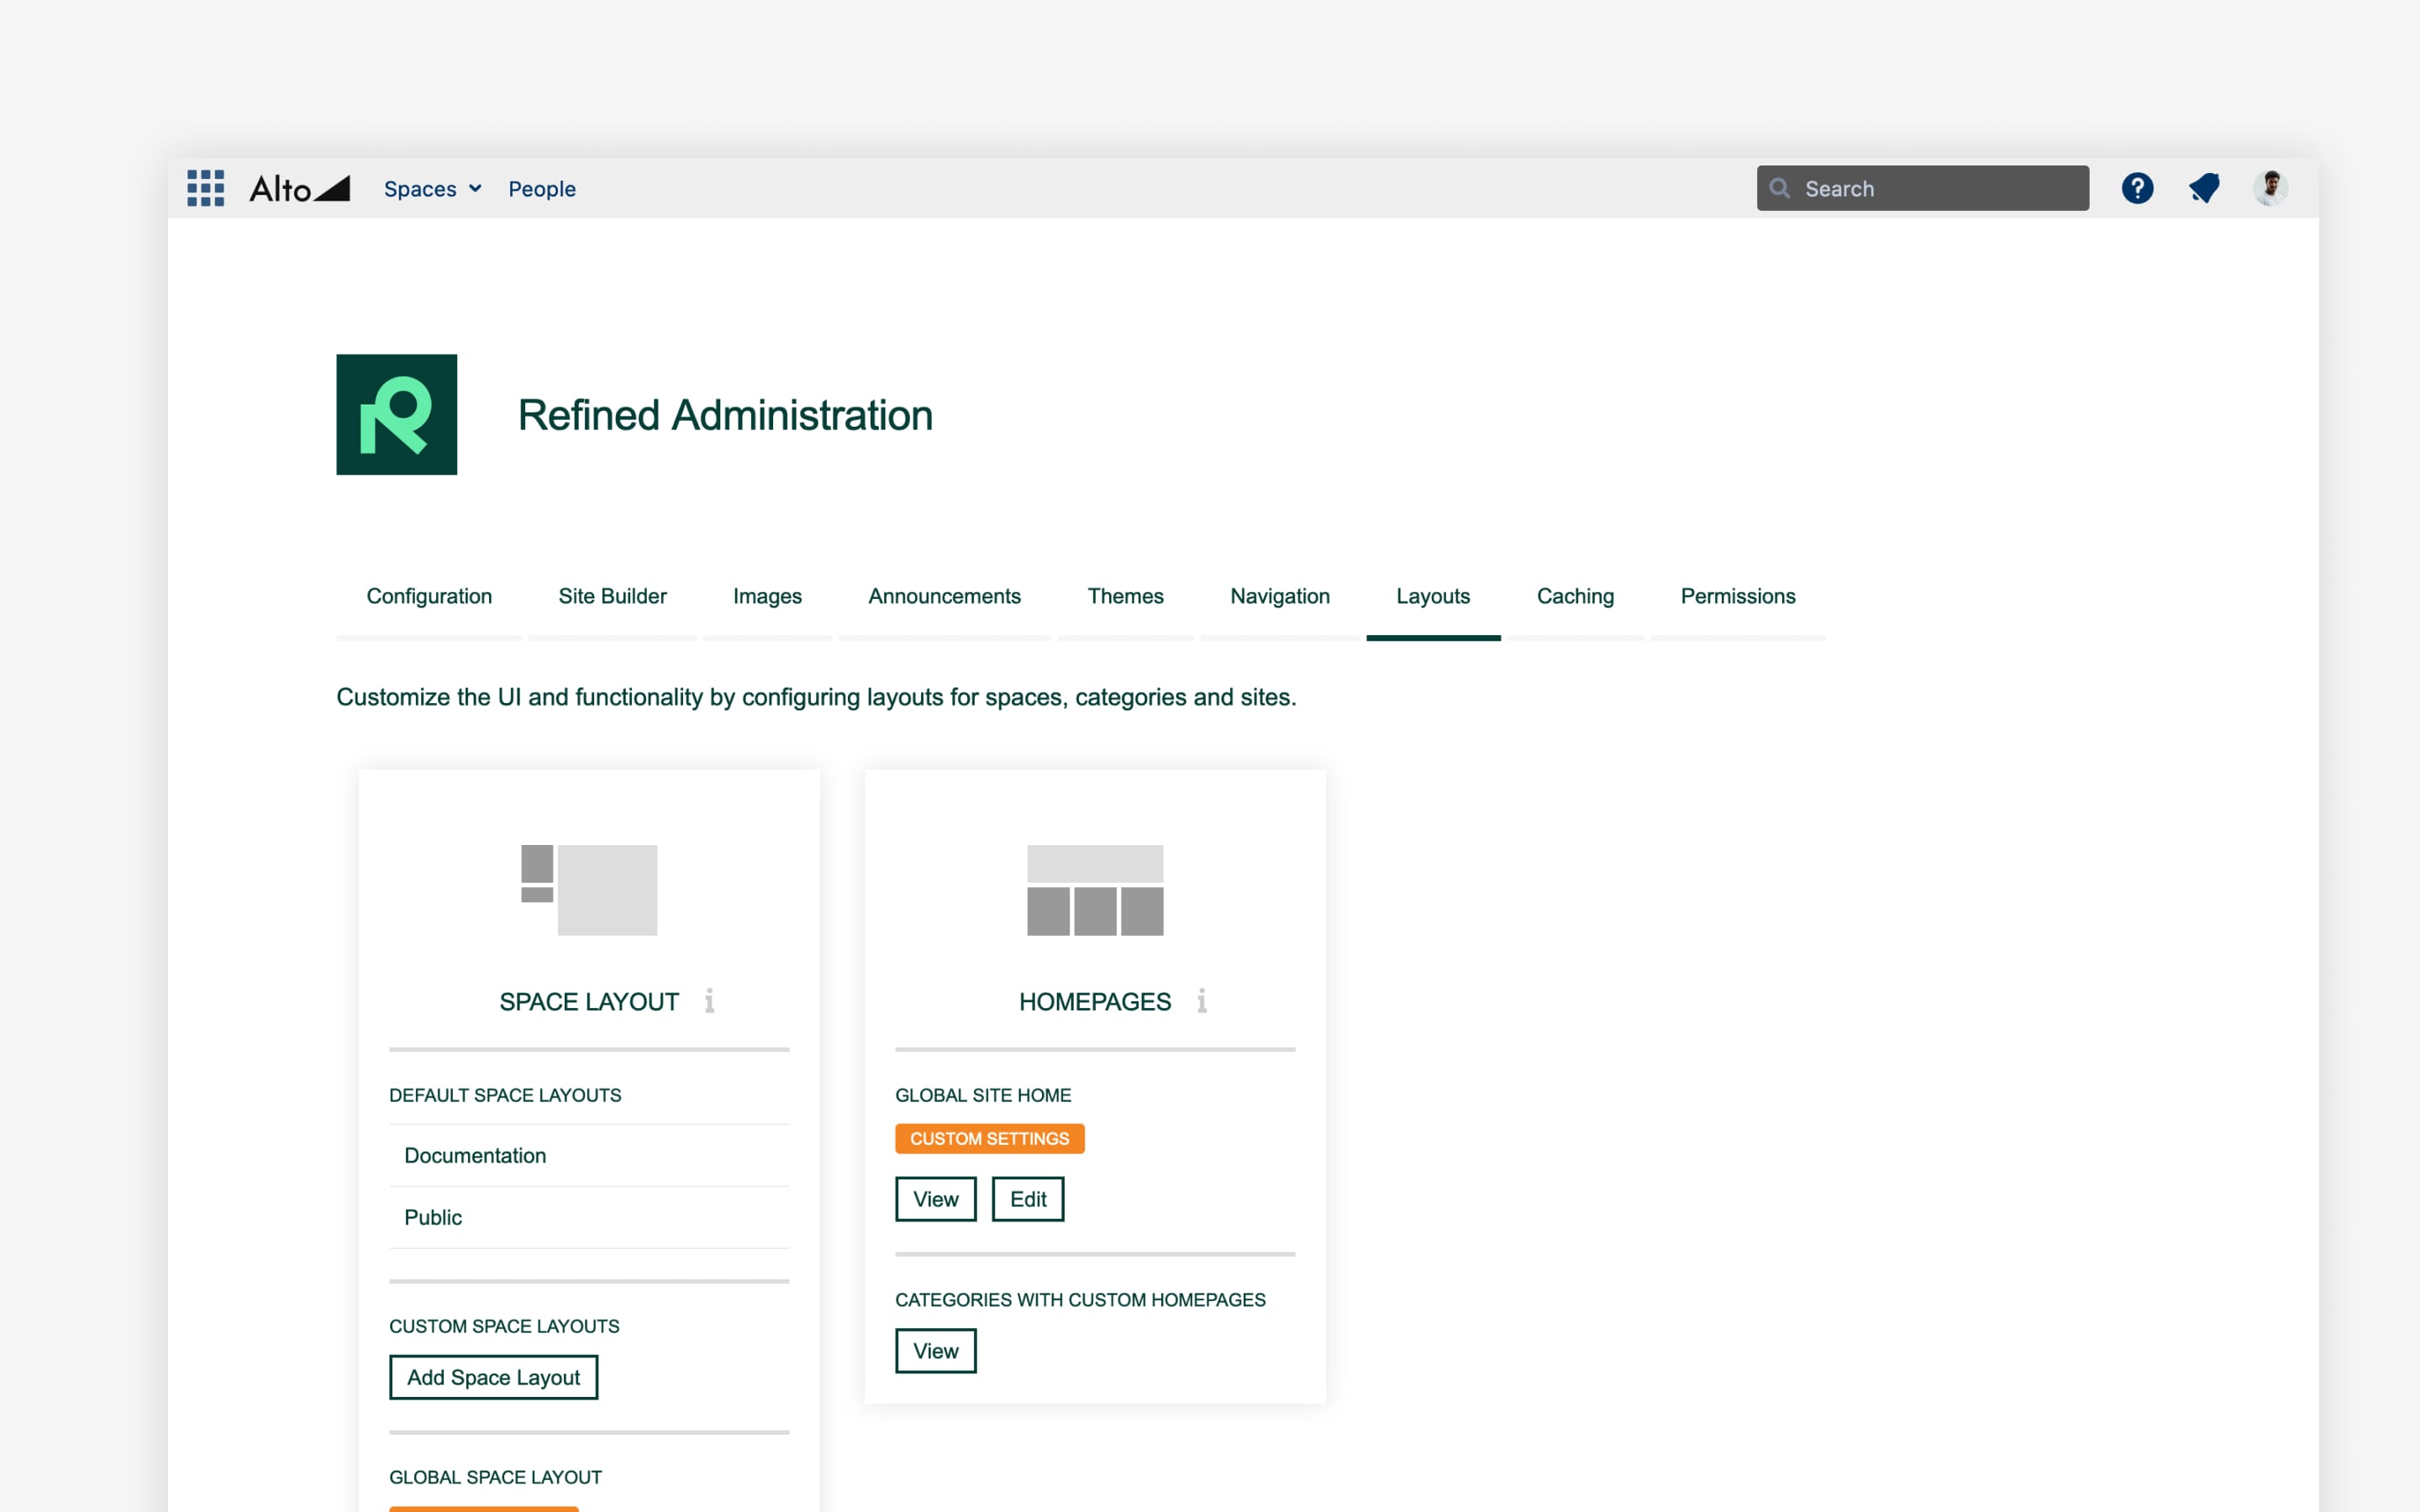
While you can customize each space independently, you may want to keep the look and feel consistent. You also may want to avoid building a new layout from scratch every time you're designing a new space.
To save time, you can easily create your own templates under the Layouts tab in the Refined Administration. If you train space admins to work from the templates, you'll nurture a consistent look across spaces while saving time.
Tip 7: Use filters to show relevant content
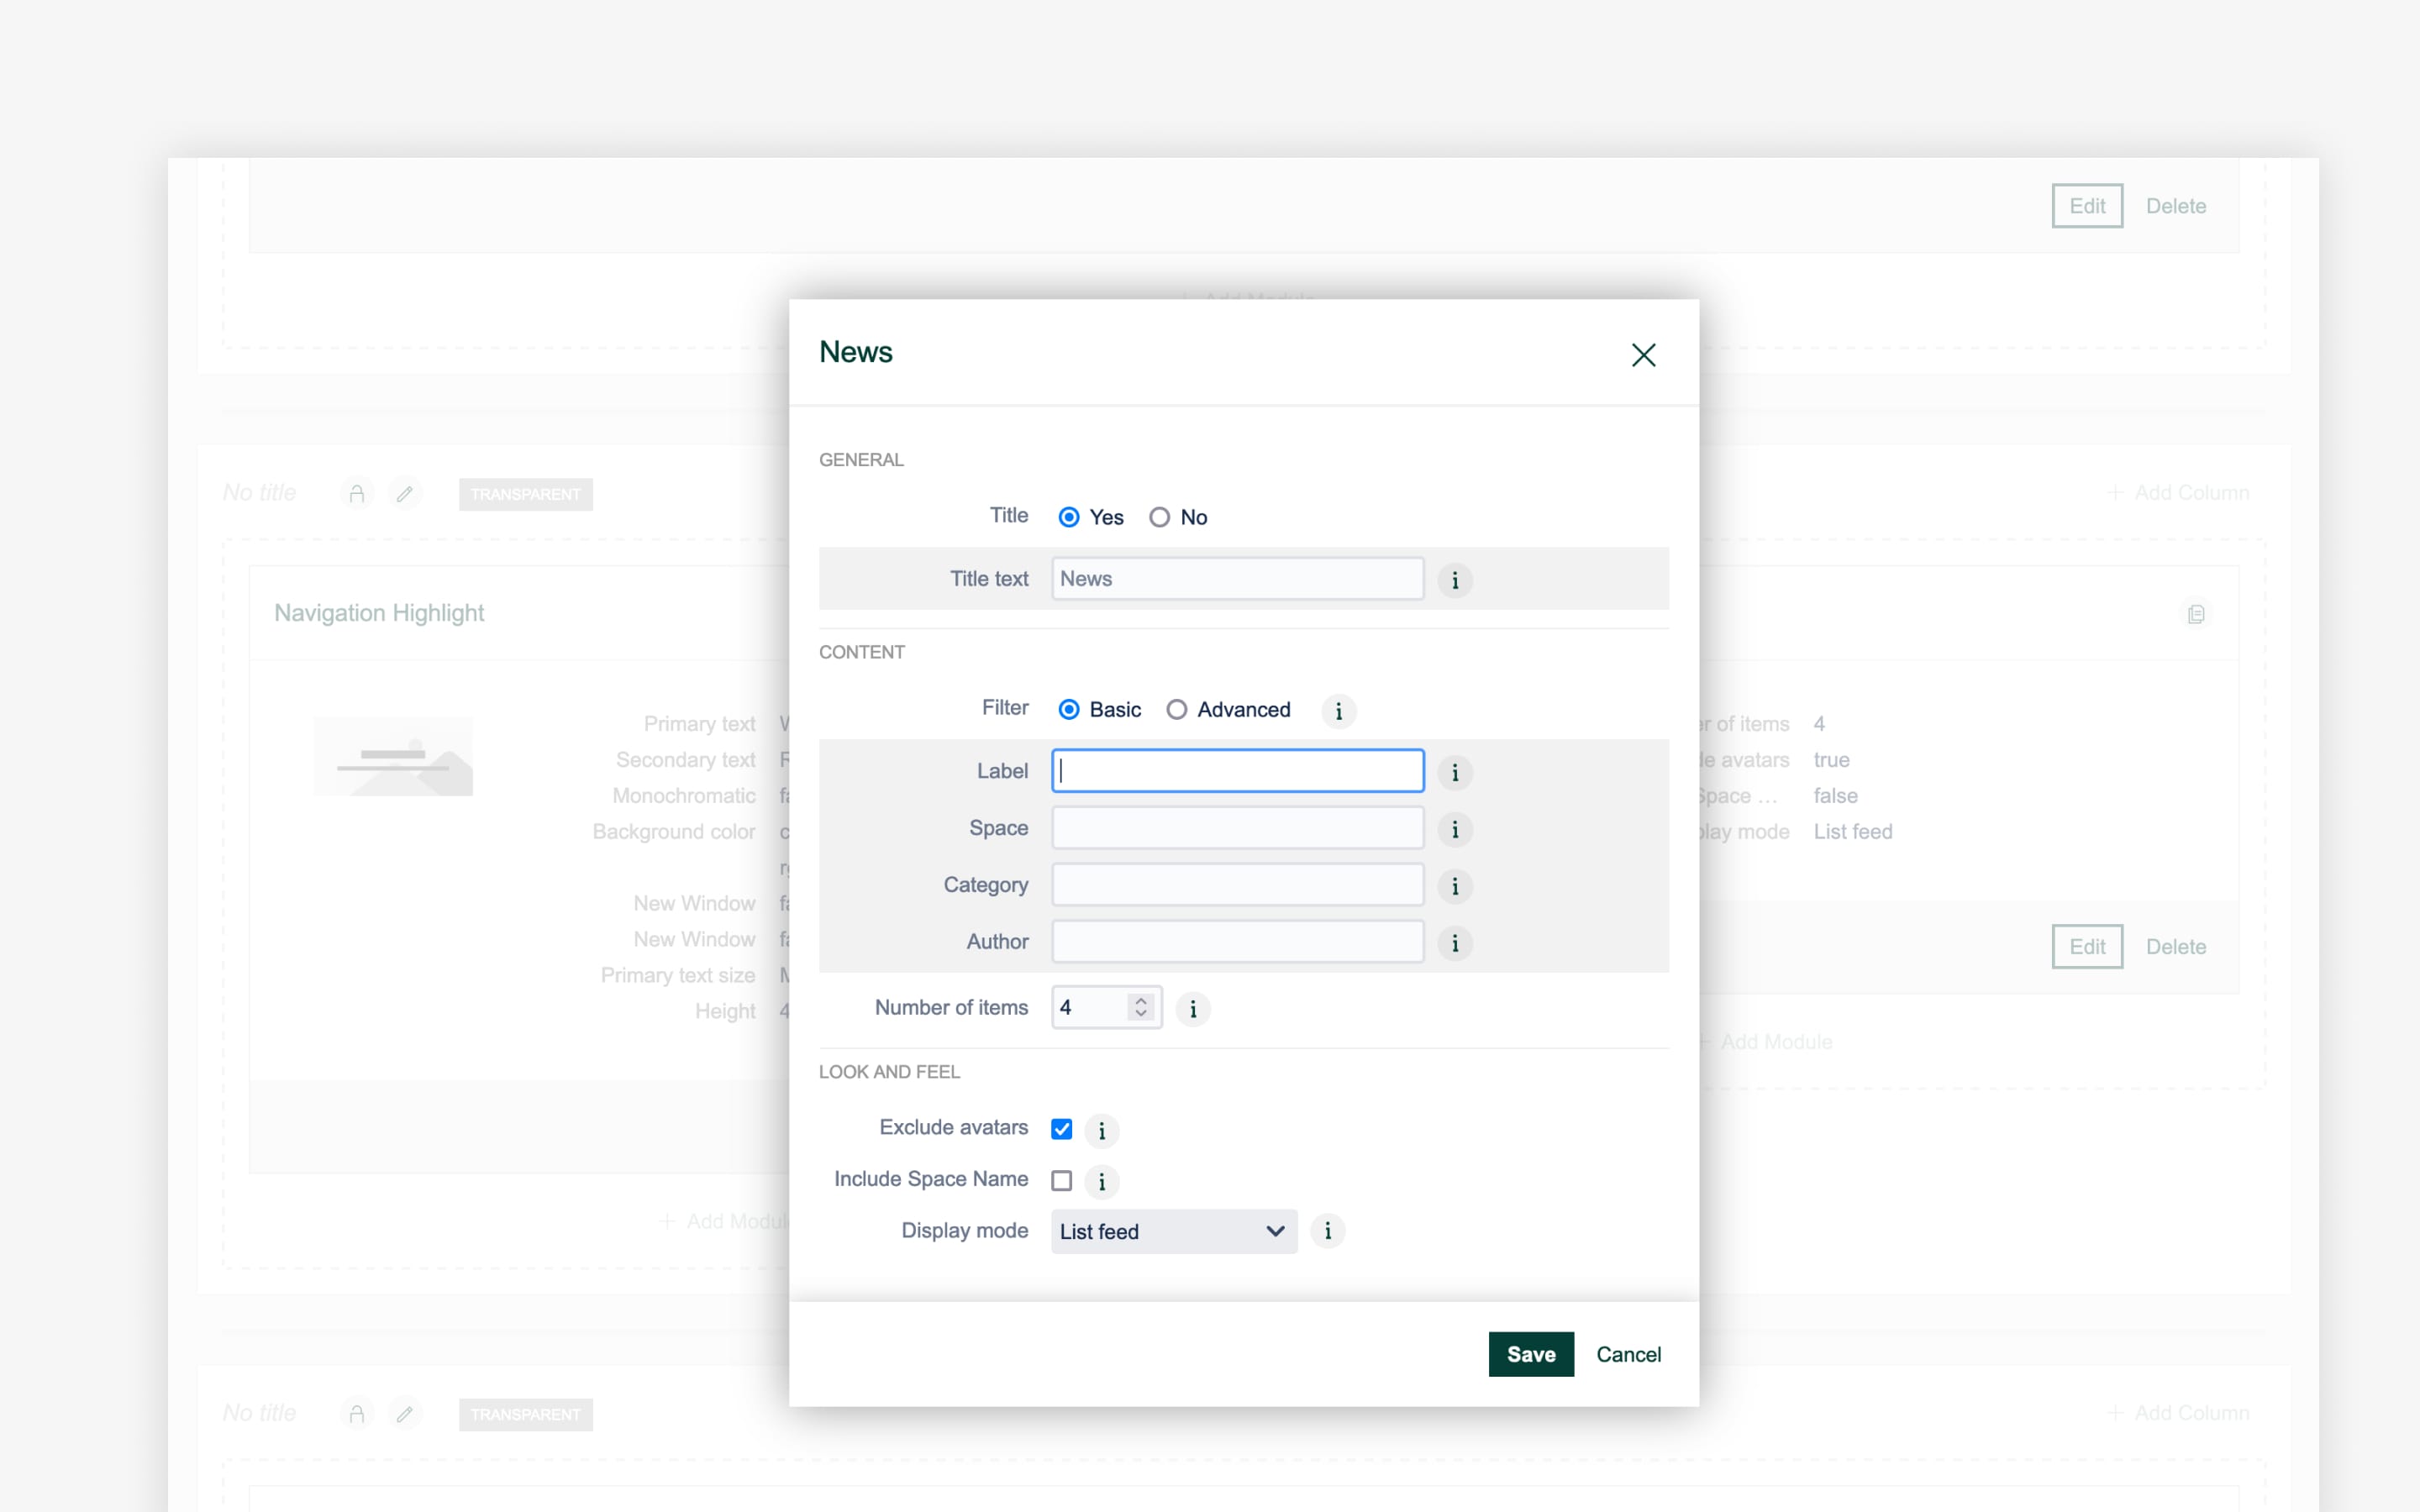
Large intranets mean different users are finding value in different places. To account for this, you can configure modules to showcase a limited set of content that’s relevant to the end user.
For instance, if you have 1,000 blog posts on a particular site, you could filter a news module to display only the ones labeled a certain way. This could mean seeing company-wide content on the company-wide global site home, but then filtering a news module pulling from the same space for HR-specific posts on the Human Resources space home.
This can be done using basic filters on the modules, (search, news, activity, etc…) to narrow down the results given by that module. These filters are particularly useful when there's a large volume of content available.
You can also use advanced, CQL-powered filters to fully control what the modules are showing. This allows you to display a user's favorite pages, list mentions, all the blog posts from a specified Category, and more.
Tip 8: Consider using a separate blog site
A newsfeed can be a helpful component of any large intranet. To keep things organized, why not have a dedicated blog site to house all your blog spaces? Using the site structure, you can organize posts into topics, and choose which blogs to display on the site home.
These blogs would be accessible globally, meaning you can put company-wide news for everyone on that site to maintain other, more targeted blogs on separate sites and Categories.
You can also use Refined to migrate any existing blog posts on separate pages onto another, designated blog space.
Tip 9: Integrate with other apps from the Atlassian Marketplace
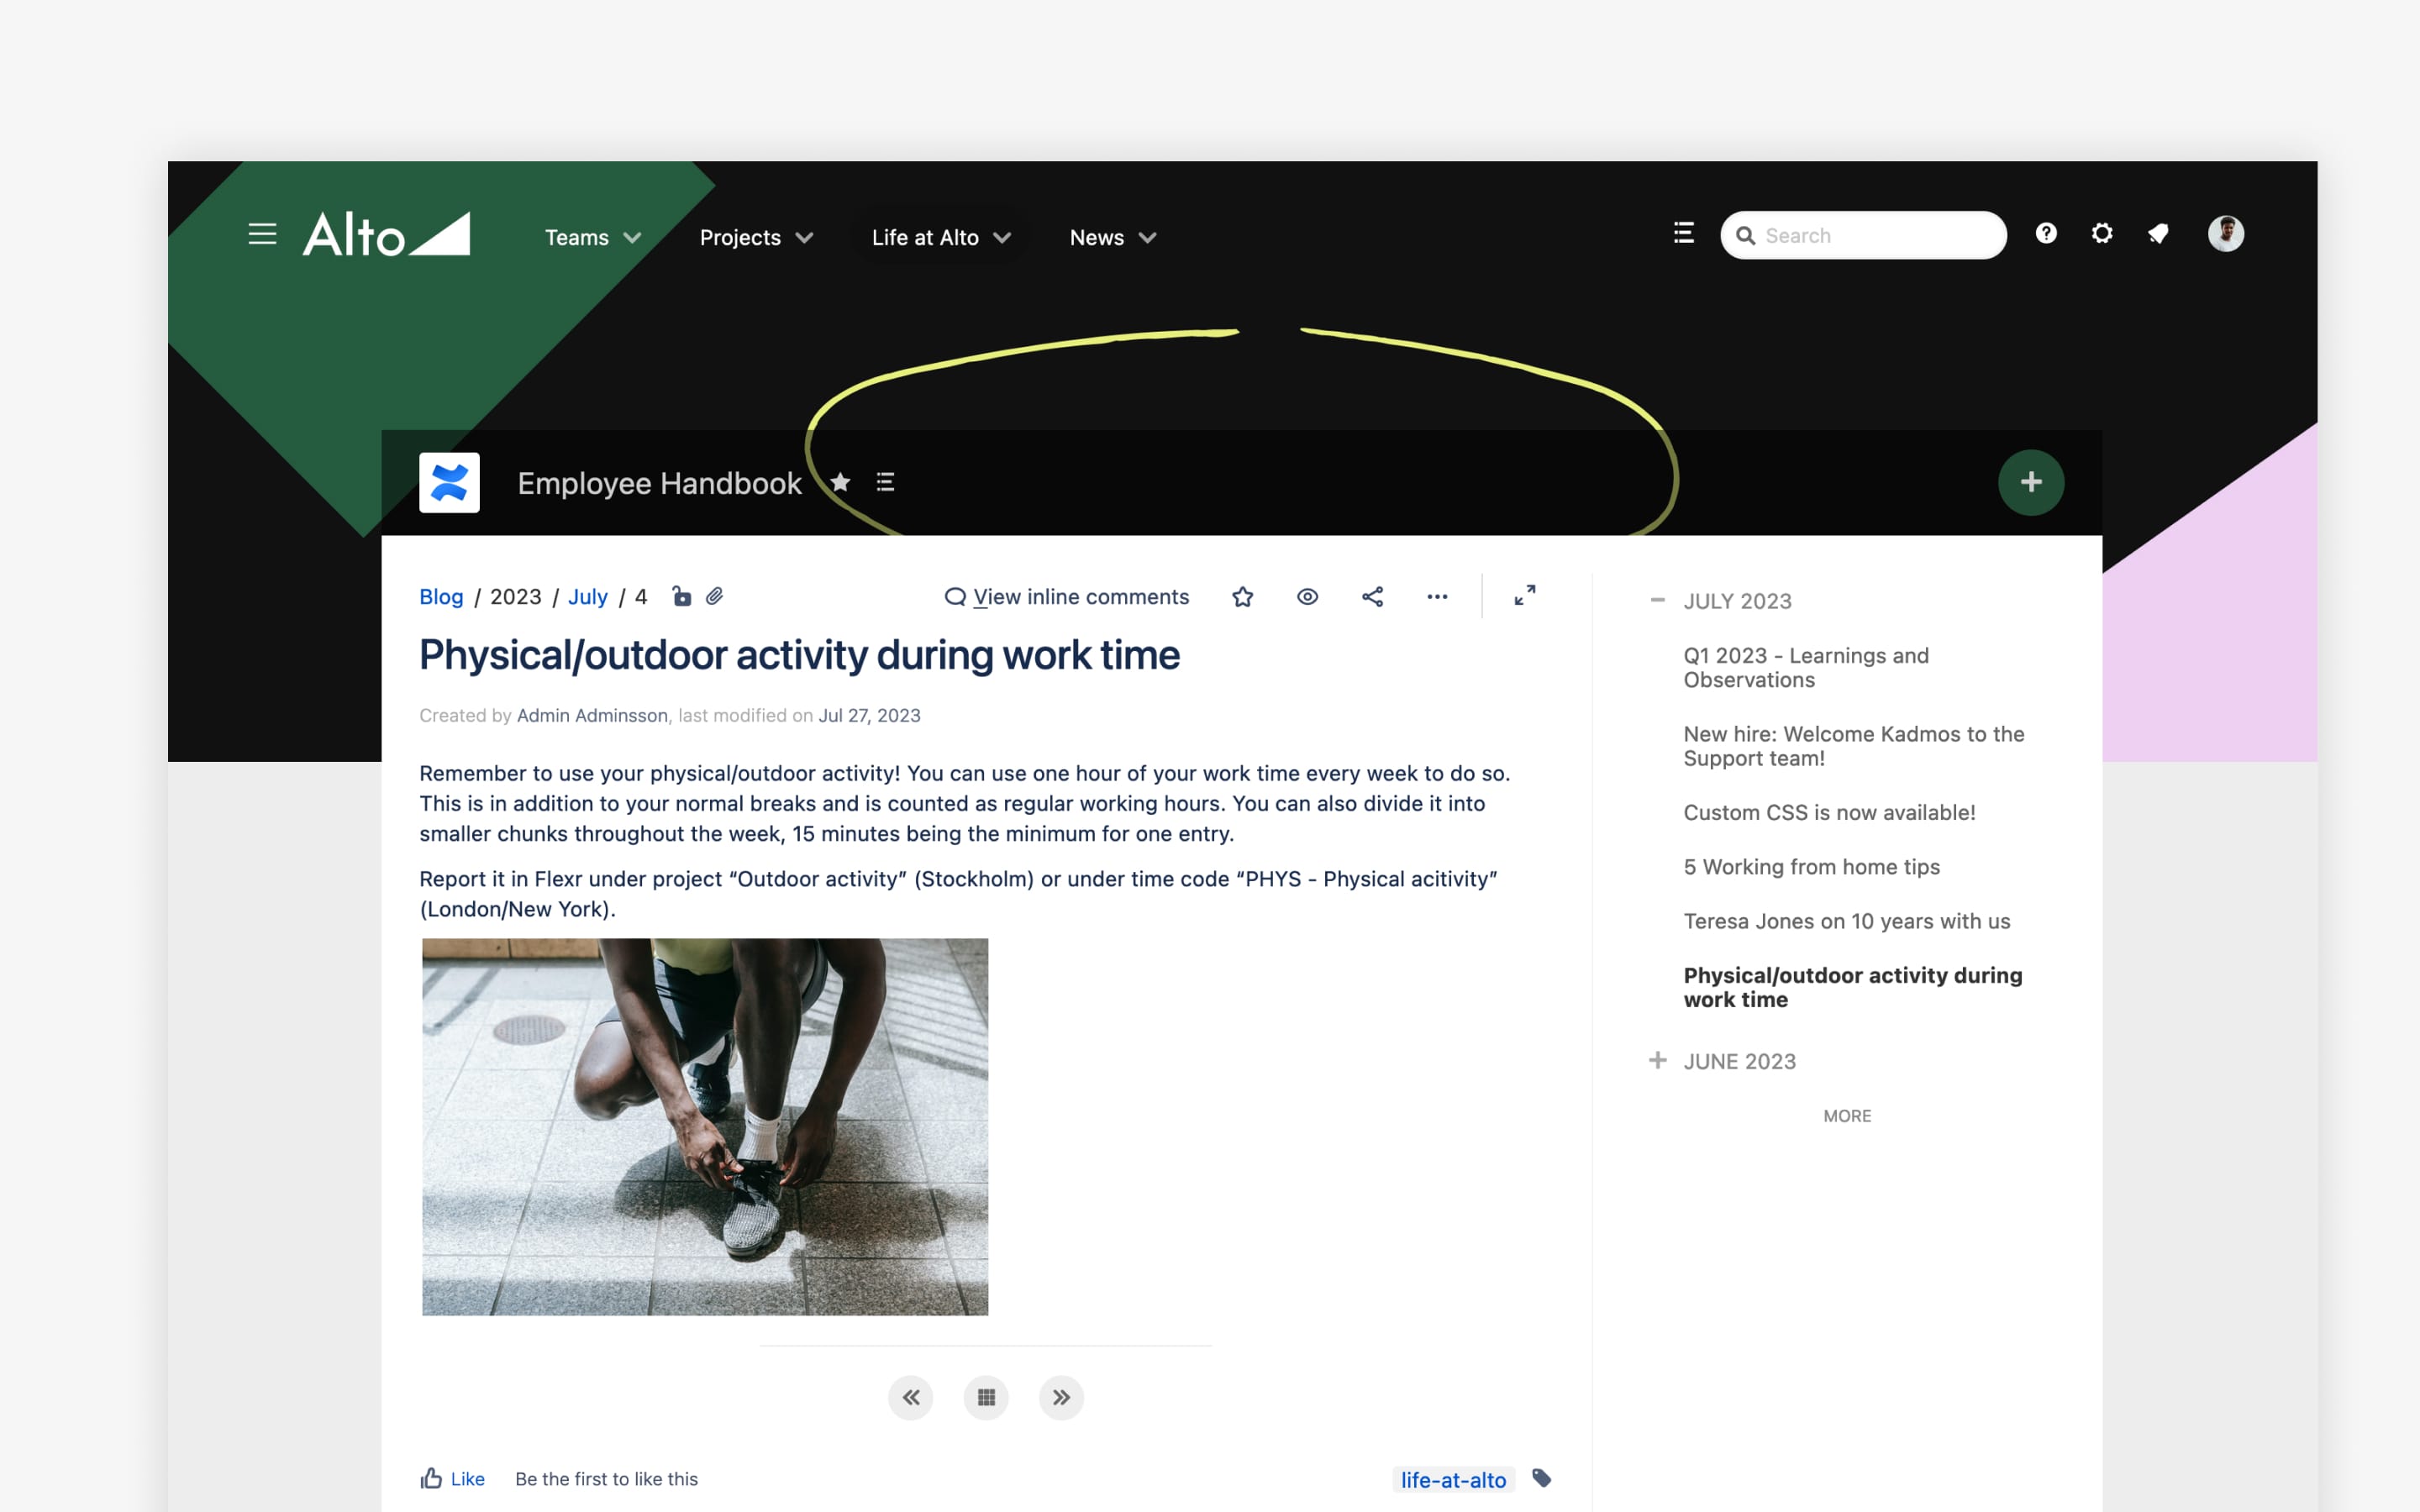
Refined integrates with user profile apps, calendars, weather apps, and a slew of other Atlassian apps that help you make the most out of a wide-reaching intranet.
Refined will render Confluence content on pages as expected, including content from other apps or macros.
Explore apps for Confluence on the Atlassian Marketplace.
A bigger, better Confluence intranet
Large Confluence intranets need not be disorganized or difficult to use. Try building your own Refined intranet by downloading Refined for Confluence from the Atlassian Marketplace for a free 30-day trial.
Read more about


Try Refined free for 30 days


